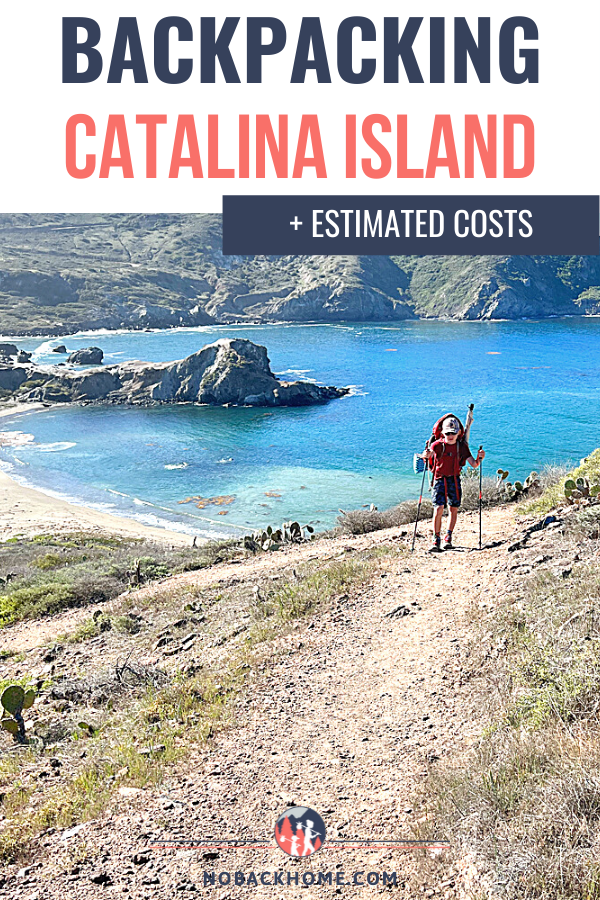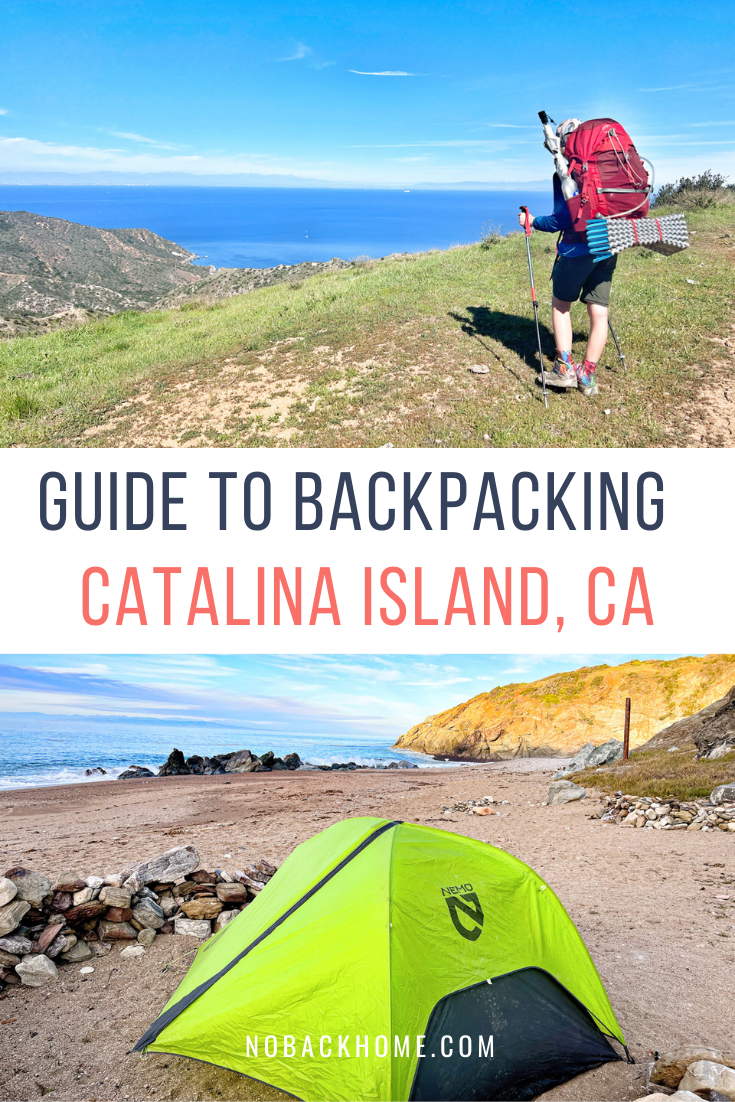
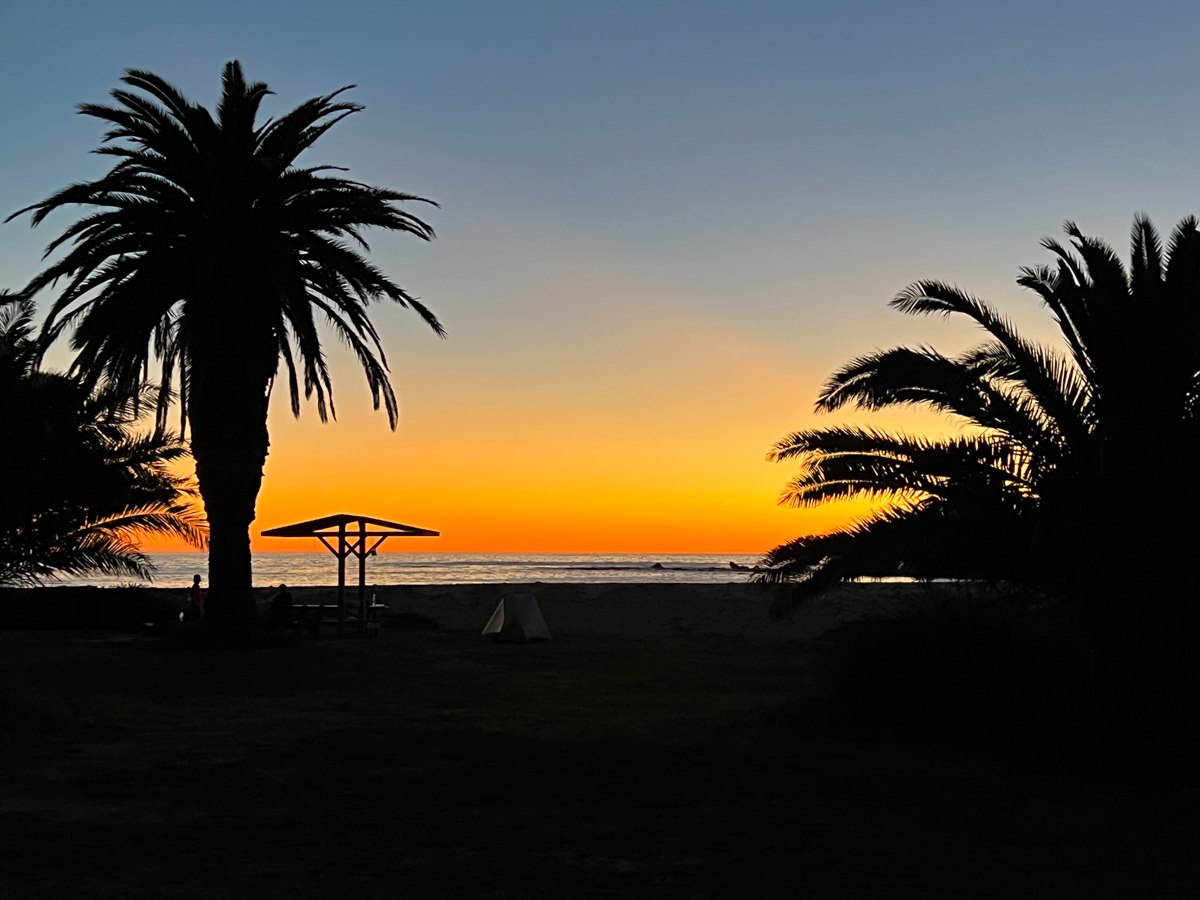
Backpacking the Trans Catalina Trail is a bucket list trail for many in Southern California. Located 22 miles off the coast of Southern California, Catalina Island offers diverse rugged scenery with opportunities for outdoor activities like diving, snorkeling, hiking and spotting wildlife. It is here that the Trans Catalina Trail resides – from sea to land and back to the sea, this 38.5 (or 40+) mile trail traverses the entire island with beachfront camping, beautiful views with a few creature comforts not often found in typical backcountry trails. Think restaurants, picnic benches and firewood deliveries!
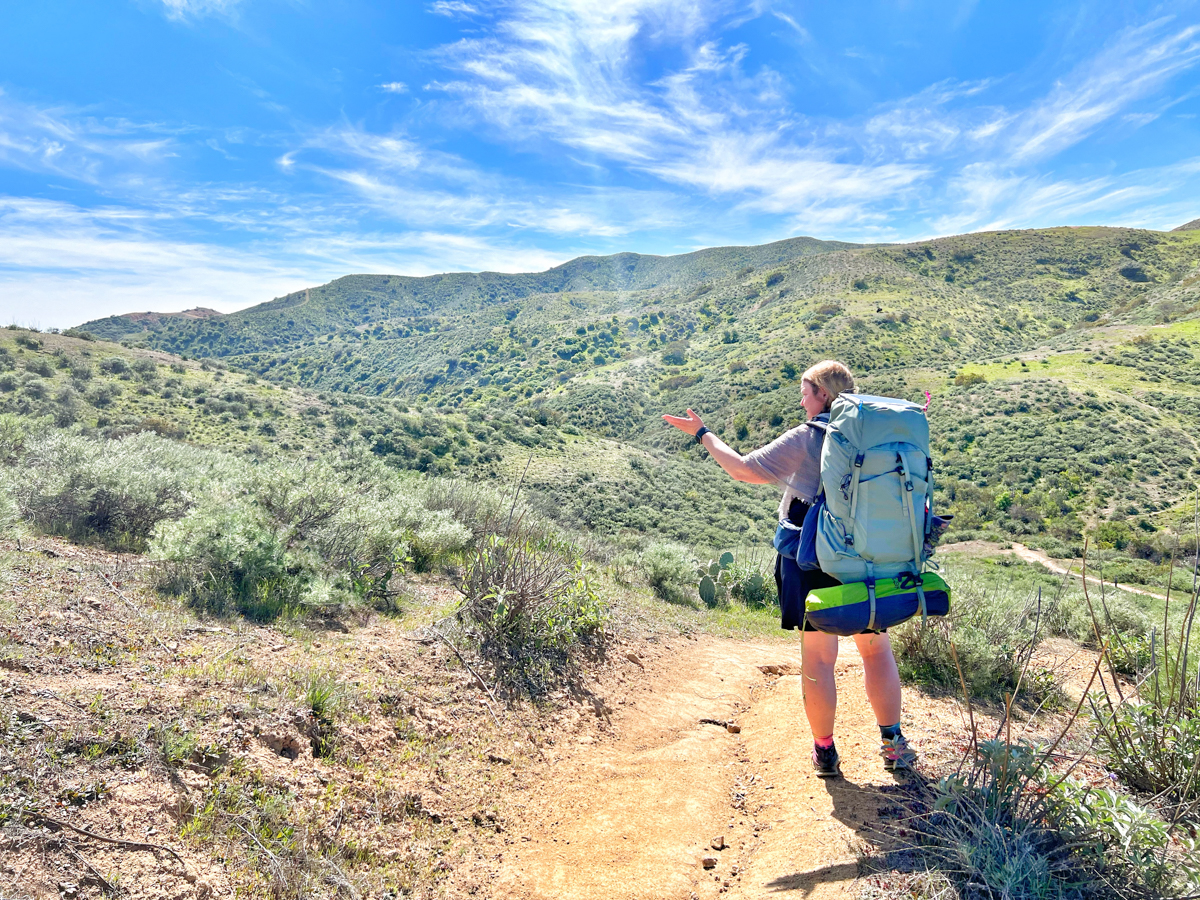
One might think this trail would be easy since the highest elevation on the island is only around 2000 feet, but the constant ups and downs, lack of switchbacks with little shade make backpacking on Catalina Island challenging. The Trans Catalina Trail has been on my wishlist for years, but the expense and difficult rating continued to scare me away. However, as we learned during our trip, the beauty of this trail is that it is difficult, but doable and can be modified to fit all skill levels!
Jump to a Heading Below
General Info on the Trans-Catalina Trail
Even though Catalina Island is not close to the Channel Islands off of Ventura, they are considered to be part of the islands archipelago (but not the national park!). The Trans Catalina Trail is operated by the Catalina Island Conservancy on the island. The official trail itself starts from Avalon and crosses through and then returns to the small town of Two Harbors.
TRANS-CATALINA TRAIL STATS:
- Total Distance: 38.5 – 41 miles
- Total Elevation Gain Loss: +/-8,615 feet
- Difficulty: Challenging
- Advanced Reservations Required: Yes
- Number of Recommended Nights: 4 nights / 5 days
- Cell Service: Occasional
Can Anyone Do This Hike?
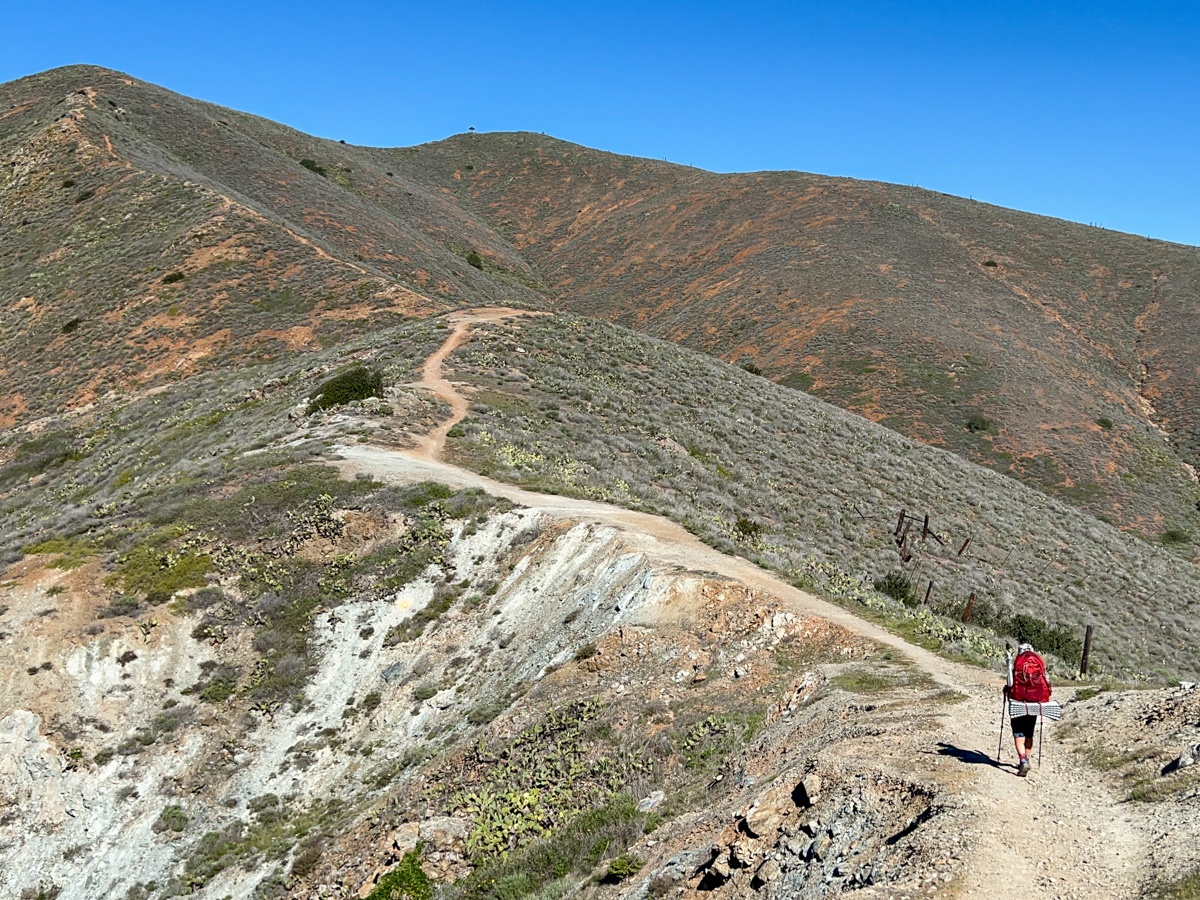
As I mentioned above, the Trans-Catalina Trail is no walk in the park — it is a hard trail. Over the 38+ miles, there is a ton of up, down, up, down – in total over 8,600 feet in elevation gain/loss. Not only are you gaining a lot of elevation each day, but you are doing it typically in a straight up and straight down fashion. That along with the lack of shade along the trail is what makes this trail challenging.
All that said, backpacking on Catalina Island is an experience more than worth the challenge. There are alternative route options you can take if you want to avoid some of the elevation gain or if you just want to get a sample of this beautiful island.
One thing to note, this is not a typical backcountry trail. You will not be in the vast wilderness all alone. You will often be hiking along the road, where vehicles will pass. There is an airport you will cross paths with and of course you will find yourself cutting through the small town of Two Harbors!
This trail can be traveled in either direction, but I recommend starting in the town of Avalon and ending your hike at Parsons Landing (returning to Two Harbors to get the ferry back to the mainland). In this direction, you will end with the perfect night of solitude on an isolated beach.
Catalina Island Weather – When To Go?
The Trans-Catalina Trail is open and hikeable year-round. However, I would suggest you hike the TCT in early winter or late winter. Depending on the year’s rainfall, spring can also be a great time to visit.
The most important thing to note is that the trail is exposed with little to no shade or tree coverage. Even in highs of the 60s, the sun can feel quite intense, so I can only imagine how difficult it would be in the summer temperatures of the 80s and 90s.
Winter will be hit or miss often due to the potential for rain and cooler nights, but overall I highly recommend going at this time of year as it’s cheaper (off peak is end of Oct to beginning of March) and the islands are less busy with day hikers.
Logistics for Backpacking on Catalina Island
 One of the trickiest parts of any thru hike backpacking trip is sorting out all the logistics. Catalina is no different. Here you not only have the intricacies of figuring out the amount of time you can do the hike in, but also how to get to the island!
Getting to Catalina Island
There are two ways to get to Catalina Island – by boat or by helicopter. While most visitors make their way to the islands on one of the many ferry options, those with more money than time can consider flying over. Boats go with Catalina Express Ferry, departing from Long Beach, San Pedro, Dana Point. The only boats going to/from Two Harbors leave/arrive from San Pedro, so this is something to keep in mind if you leave from a different port.
It is also worth noting that during the off season months (winter), boats do not depart every day or as frequently. This will need to be taken into account when planning your itinerary. As soon as you have your campground reservations, book your preferred boat departures as they do sell out.
Other ferry options are from Newport Beach, where you can catch the Catalina Flyer to Avalon. And lastly, Island Express Helicopters offers flights from Burbank, Long Beach, San Pedro and Orange County.
Camping Reservations + Hiking Permit
Reservations are required for all parts of this trail. There is no dispersed camping allowed on the island outside of established campsites. You can see a list of all the campgrounds on the Trans-Catalina Trail below. Because you must make reservations, there are no other permits required.
Booking Your Catalina Island Backpacking Trip
The best option for booking your Trans Catalina backpacking trip is to do so on the Catalina Island Tourism site. There is a specific button for those hiking the TCT which allows you to choose how many days you will do the trail and to check availability at each campground. This can get tricky as some campgrounds have very limited space. If you run into this issue, the next best option is to call them at 310.510.4205 and ask for the dates specific campgrounds are available so you can build your itinerary around that. This is what I had to do, as I kept getting through the entire reservation only to find out that Parson’s Landing was fully booked.
For most people, their itinerary decisions hinge on the boat departures and the availability of Parsons Landing.
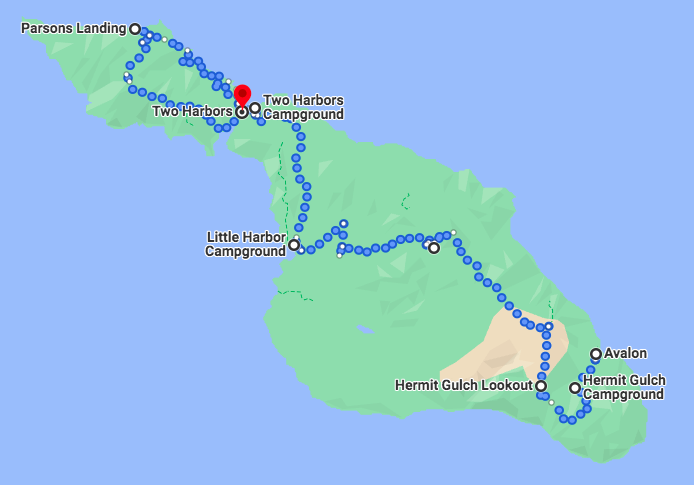
Trans Catalina Trail Map
This map here shows you all the various trails, water stops and more while on the Santa Catalina Island.
Campgrounds on Catalina Island
There are multiple campgrounds on Catalina Island which provides a good deal of flexibility in designing your route along the TCT. The traditional route starts at Avalon and ends at the other end of the island at Parsons Landing, with stops at all of the following campgrounds. Note: Make sure you know what your campsite number is before you arrive to each site!
Hermit Gulch Campground
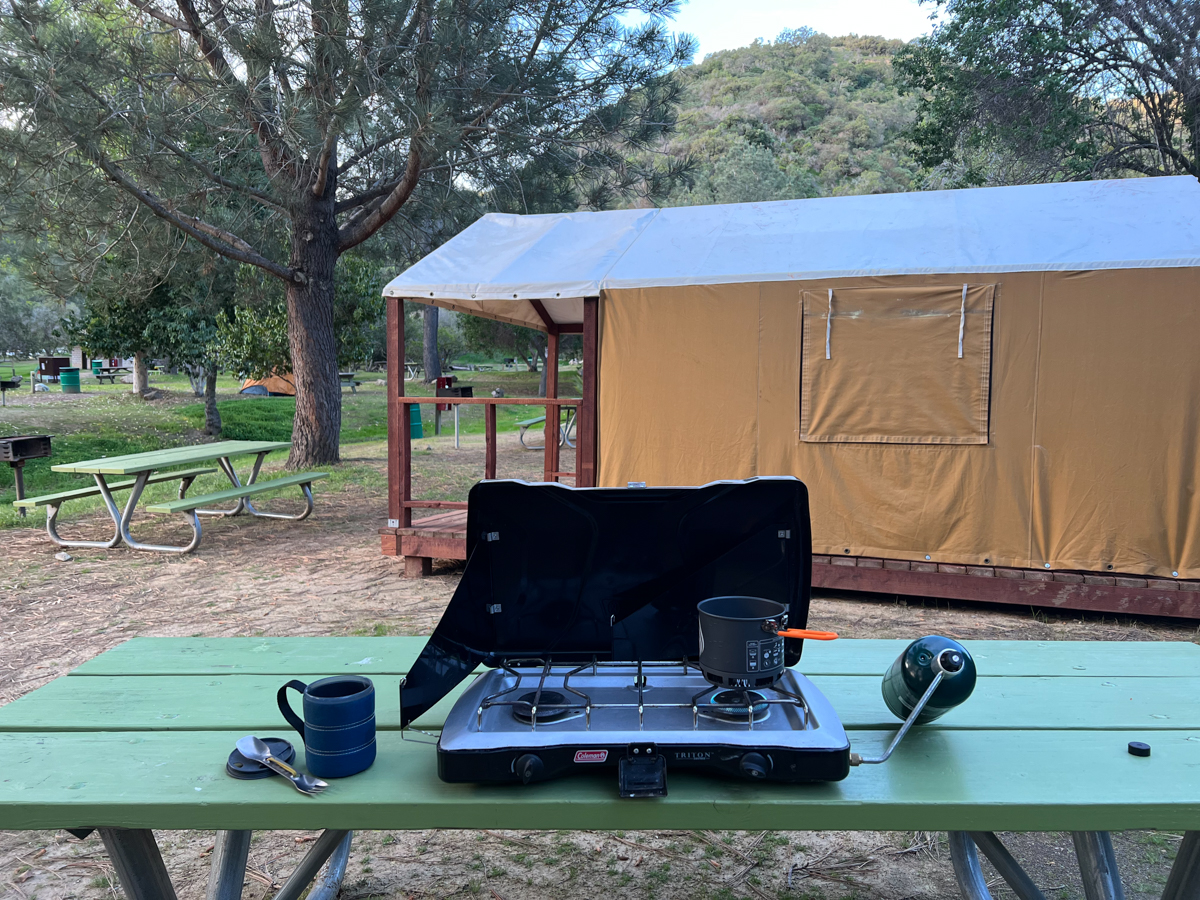 Hermit Gulch Campground is located about 1.5-2 miles from the town of Avalon on the Hermit Gulch trail. This campground has 40 tent sites and 7 cabins available. Many people planning to hike the Trans Catalina Trail opt to stay here for their first night in order to get an early morning start on the trail. Knowing that we would not arrive until close to sunset, we opted for a canvas tent cabin so that we didn’t have to rush and set up our tent that first night. Cabins are not cheap, but they are decent and a good option for anyone who might be visiting the island and is not into camping every single night. Cabins include cots, a lantern (with charging abilities) and a Coleman camping stove with fuel.
Blackjack Campground
 Blackjack Campground is the first campground that most TCT backpackers stay at. This is also the only campground that does not have any ocean views. Blackjack is the highest elevation (1,600’) campground with views of rolling hills and rugged canyons. There are only 10 tent sites here, but there is potable water, cold outdoor showers and chemical toilets. No campfires are currently allowed here. Our favorite site here is number 10 as it is the only one with a shade covering. Otherwise, to be a bit more secluded try for 1-3. We had site 8 which was great. We had our own faucet and it was not too far from the restrooms or the trail.
Little Harbor Campground
 Sunset Magazine has called Little Harbor Campground one of the best campgrounds in the west. After having visited I would agree! Overlooking the ocean on the “backside” of Catalina, Little Harbor is a larger campground with 26 sites. There is beach access from the campground, but it is not situated on the beach. There is potable water, cold showers, chemical toilets (porta potty) and some shade structures. Fires are permitted here, but you need to reserve your firewood when you book your site to ensure you have it when you arrive. Sites right on the waterfront are the best in our opinion. Many campers like to book Shark Harbor which is a short walk away. I did not love Shark Harbor however because it has NO shade at all and is just not as scenic as Little Harbor. That said, there are only 3 sites here, so it can be a fun place if you are with a group of your own.
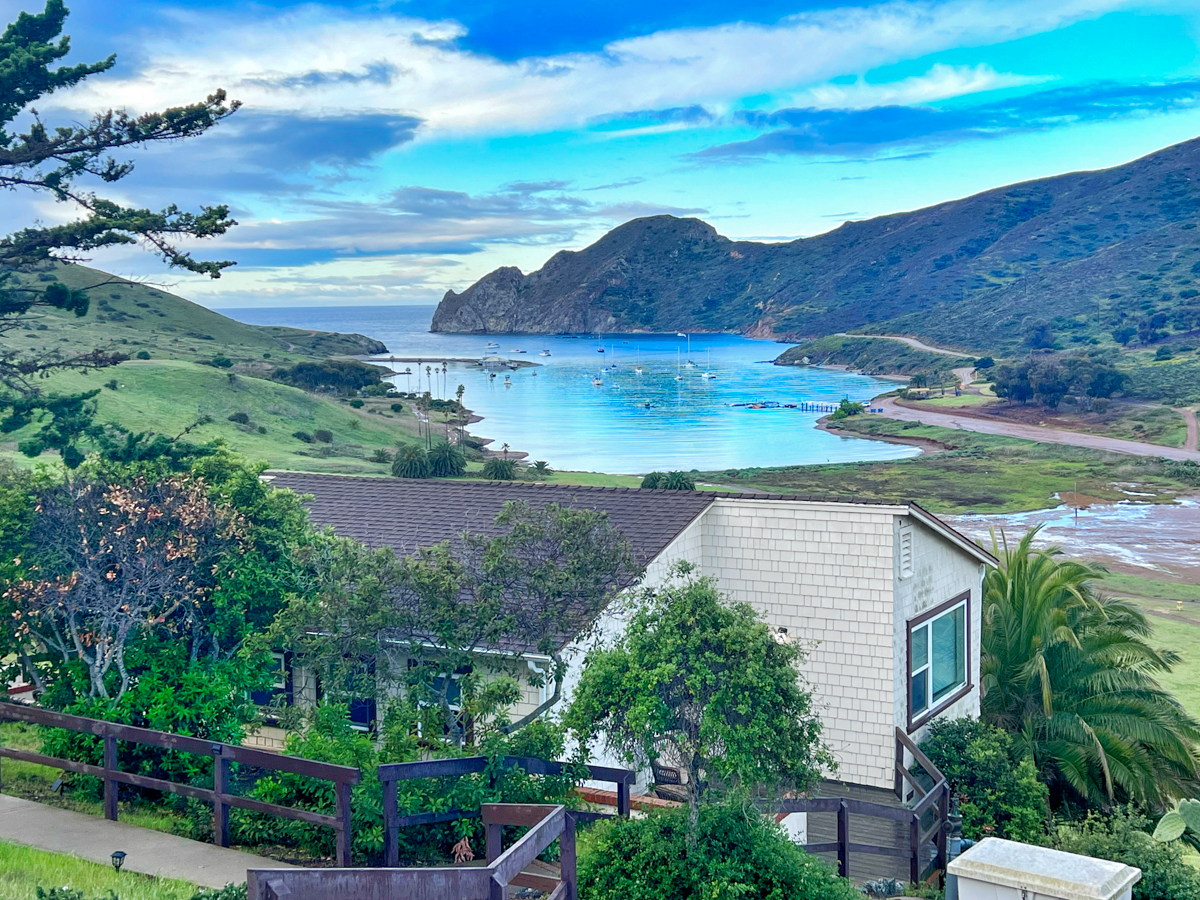
Two Harbors
 Located a short walk from the village of Two Harbors is this scenic campground with 47 tent sites and 12 tent cabins. Sites sit on a scenic ocean view bluff with beach access. There is potable water, outdoor showers, restrooms and picnic tables. Coin-operated hot showers ($2 for 3 min) and restrooms are located in town and are available to all visitors. Fires are allowed here. You can purchase firewood with your reservation or purchase when you are in town.
There are 4 sites that sit right on the bluff with no shade. They are beautiful, but can get quite windy. For less of a view, but easier beach access, we like sites 5 and 6.
Parsons Landing
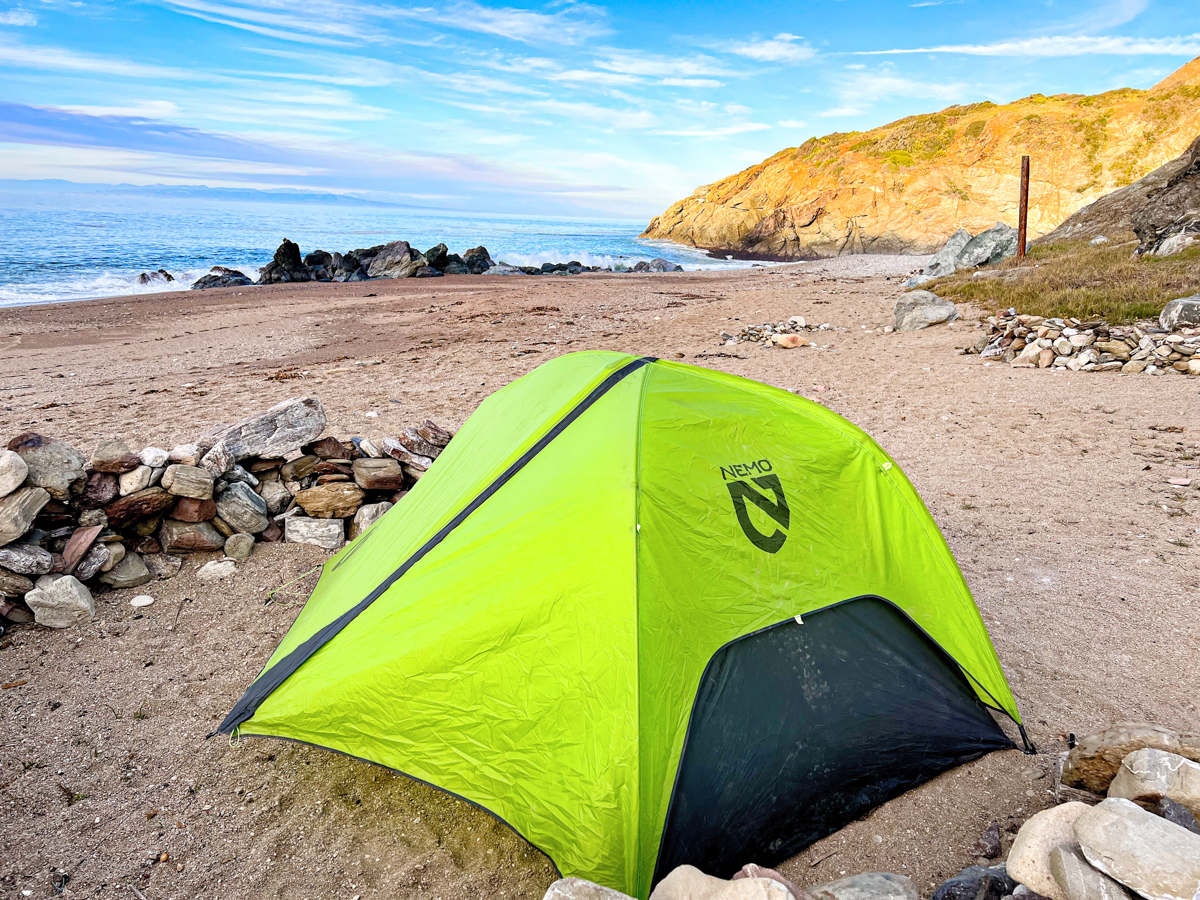 One of the most secluded and rustic of the campgrounds on the Trans Catalina trail is Parson’s Landing. This beachfront campground is accessible only on foot or by kayak. With only 8 sites, this tends to be one of the most difficult campgrounds to get reservations for. If you plan to do the TCT, book your trip around the availability of this campground – it is that amazing!
There is no potable water here. When you book your reservation, you will be asked if you want to also purchase a bundle of firewood and 2 gallons of water. I would recommend this! There is typically left over wood and water if you need more, but don’t rely on that. The sites here are actually on the beach which is one of the reasons people love it so much. There are chemical toilets and fire pits. You will need to pick up your locker combo when you are in Two Harbors to get access to the water and firewood included in your reservation. If you do not make it before the Visitor center closes, make sure to call in advance.
Trans Catalina Trail Itinerary
 There are many ways you can do the Trans Catalina Trail based on your time frame, speed of backpacking and what is available. While the trail can be hiked in 3 days/2 nights, planning a 4 day/3 night or even 5 day/4 night trip will allow more time to enjoy the trail at a reasonable pace. The trail can be hiked east to west (as laid out in the itinerary below) or can be hiked in reverse.
For us, we ended up choosing to arrive a night before our scheduled departure so that we could start the day fresh rather than having to drive to the boat launch, boat over in the morning, finalize supplies and then head out on a 10+ mile hike. But many people do arrive the morning of their hike and make it to camp without issue.
Additionally, we ended up staying a day longer than we had planned due to the lack of boats from Two Harbors on the day we finished. Again there are other options for this situation (hire a taxi) if you are limited with time, but we wanted to be able to enjoy our last day at Parsons Landing without rushing to catch a boat back that same day.
|Day 0| Arrive by boat – stay at a hotel in Avalon or at Hermit Gulch Campground (2 miles from town)
|Day 1| Hike to Black Jack Campground (10 miles from Hermit Gulch or 11.5 miles from Avalon)
|Day 2| Hike to Little Harbor Campground (with a stop at the airport – 8.8 miles)
|Day 3| Hike to Two Harbors Campground (6.3 miles to campground)
|Day 4| Hike to Parsons Landing (and add on Starlight Beach if you have energy – 7.5 miles)
|Day 5| Hike back to Two Harbor for your boat (or get transport to Avalon to return – 7.8 miles)
Alternative Itinerary Options
Alternatives to this itinerary include skipping Little Harbor campground and going straight from Blackjack to Two Harbors with a day visit to Little Harbor. This makes for a very long day and many have said they wished they would have stayed over at Little Harbor. Another option is to only hike between Avalon and Two Harbor, skipping Parson’s Landing. These options help cut down the itinerary to a long weekend.
If you are feeling like all of this is a bit more strenuous than you can muster, you can also consider hiring Catalina Backcountry to take your gear from each campsite for you! They have services for one off segments all the way to doing the entire trail for you. Then all you need to worry about is hiking on Catalina Island enjoying the beautiful views each day.
Water Availability on the Trans Catalina Trail
Unlike many backpacking trips, potable piped water is available at each campground except Parsons Landing. At Parsons Landing, 2 gallons of water is provided in your locker. That said, there is little to no water in between the various campgrounds, so we do suggest taking plenty of water, at least 3 liters, with you each day per person. This is especially important when it is hot outside as you will not find shade throughout the day.
Food for the Trans Catalina Trail
 The beautiful thing about backpacking the Trans Catalina Trail is that you can actually schedule in real food stops as you pass through certain places. One of the favorite stops for many visitors is at the Catalina Airport which serves massive breakfast burritos and bison burgers for lunch. Additionally, when you stop in Two Harbors you can pick up more food and snacks at the general store as well as eat out at the local restaurant. Note during off season the General Store closes at 3 p.m. some days and the restaurant is only open for dinner.
For any last minute food needs, there is a Von’s located in Avalon. It is not as large as on the mainland, but should provide you with some basics if you have forgotten anything.
Safety on the Trans Catalina Trail
Overall the Trans Catalina Trail is quite safe as there are no major obstacles like river crossings in your way. However there are a few things to note to keep yourself safe on the trail.
Cell Service
While cellular service is spotty, you are almost never totally alone, so you can do without a GPS device, but we brought ours just in case, but never even turned it on. We had cell service almost the entire trip except in a few spots here and there.
Wildlife
Surprisingly there is an abundance of wildlife on the trail. The two animals you will need to watch out for include bison and rattlesnakes. You can read up on rattlesnake safety here. The Catalina Island Conservancy has a great bison safety sheet that can be found here. Other animals to keep an eye out for include bald eagles and the Catalina Island fox.
Sun Protection is a Must
Regardless of what time of year you are hiking on Catalina Island, you will need sun protection. Hat, sunscreen or even these cool lightweight hiking umbrellas. It is hot when there is no shade even at 60 degrees as you trudge up the mountainside.
Bring Hiking Poles
I adore my hiking poles and always take them with me on any trail, but this is one trail that you really do need them. There are so many steep uphill and downhill sections that it’s very helpful to have poles to help you stay upright!
Food Storage
While there are no bears here and bear canisters are not required, we do suggest that you make use of the critter boxes at most of the campgrounds. We loved hiking without our bear canisters this time, but if you have a lightweight one, it does make it easier to store your food at camp and while hiking. Be aware of the foxes and critters at Two Harbors as there are no critter boxes here. Additionally, the crows are very naughty at Parsons Landing and will OPEN your bag to get at your food.
Trans Catalina Backpacking Gear
You can see my post on backpacking gear for a general idea of what I recommend when backpacking. For Catalina, the items I would add to the must take list include a lightweight sun umbrella. Yep, I know it sounds weird, but it is a common sight on the Pacific Crest Trail with thru hikers looking to avoid excessive sun exposure. Here on Catalina, having a sun umbrella can lower the temperature up to 15 degrees!
In that same realm, I would highly suggest a full coverage sun hat, sunscreen, chapstick with SPF and even sun gloves to protect your hands.
I would also say that hiking poles are essential, even though we saw many without them, on this trail as there is a lot of up and downs to maneuver through.
Cost of Backpacking on Catalina Island
 This is one trail that takes a little more cash flow than typical backpacking trips. I was shocked at how expensive it is, but I will say having done it that it is worth every penny! It is a unique experience that deserves to be on the bucket list for all backpackers!
Below I outline all of the expenses that we encountered while backpacking the Trans Catalina Trail.
- Parking at Ferry Building – $120
- Ferry over to Avalon for 2 people – $68.25
- Cabin Rental at Hermit Gulch Campground – 134.69
- Trans Catalina Trail Camping Reservations – $249.66 (Blackjack was 42.25; Little Harbor was 55.39 with firewood added on; Two Harbors was 73.39; Parsons Landing 78.63 with additional firewood and water)
- Meal at Airport – $40
- Food in Two Harbors – $120 (dinner x2, plus pizza lunch and snacks)
- Overnight in Two Harbors – $168
- Ferry from Two Harbors back to San Pedro for 2 – $68.25
Total for the entire trip: $968.85
Again, we ended up staying an extra night since the ferry wasn’t operating on the day we finished. We could have reduced costs there, by getting a taxi back to Avalon and leaving the day we finished the TCT. Additionally, we splurged on the tent cabin (which actually wasn’t that much more surprisingly) the first night since we didn’t want to put up our tent in the dark.
INSIDERS TIP: Join the Catalina Conservancy and get 50% off your camping reservations, which more than pays for itself!
Backpacking on Catalina Island Trip Report
 Day 0: San Pedro >> Avalon >> Hermit Gulch
Our first day consisted of taking the afternoon ferry over from San Pedro to Avalon. Since we knew that we would be arriving near to sunset, we decided to book a cabin at Hermit Gulch rather than have to pitch our tent in the dark. This also meant that we had time to explore Avalon a bit. We checked out the grocery store (I don’t know why, but this is always a favorite thing of mine throughout the world!), ate dinner at a local Tex-Mex spot and then headed up to our campground in the dark.
We stayed in a canvas tent cabin, so all we had to do was pull out our sleeping bags and brush our teeth. Perfect first night.
Note: If you have time, stop into the Trans Catalina Trail shop located on the water for exhibits about the trail and to pick up a map.
Day 1: Hermit Gulch >> Black Jack Campground
 Our first official day of backpacking started off with a quick breakfast using the Coleman camping stove that was included in our cabin reservation. This was great because I did not bring a full fuel canister for our trip and wanted to concserve it as much as I could. We aimed to leave early, but we didn’t actually make it out to the trail until after 8 a.m. It was cold at the campground but we warmed up very quickly as we started our ascent up the mountain. I would recommend just dressing for the heat and powering through that first cool section.
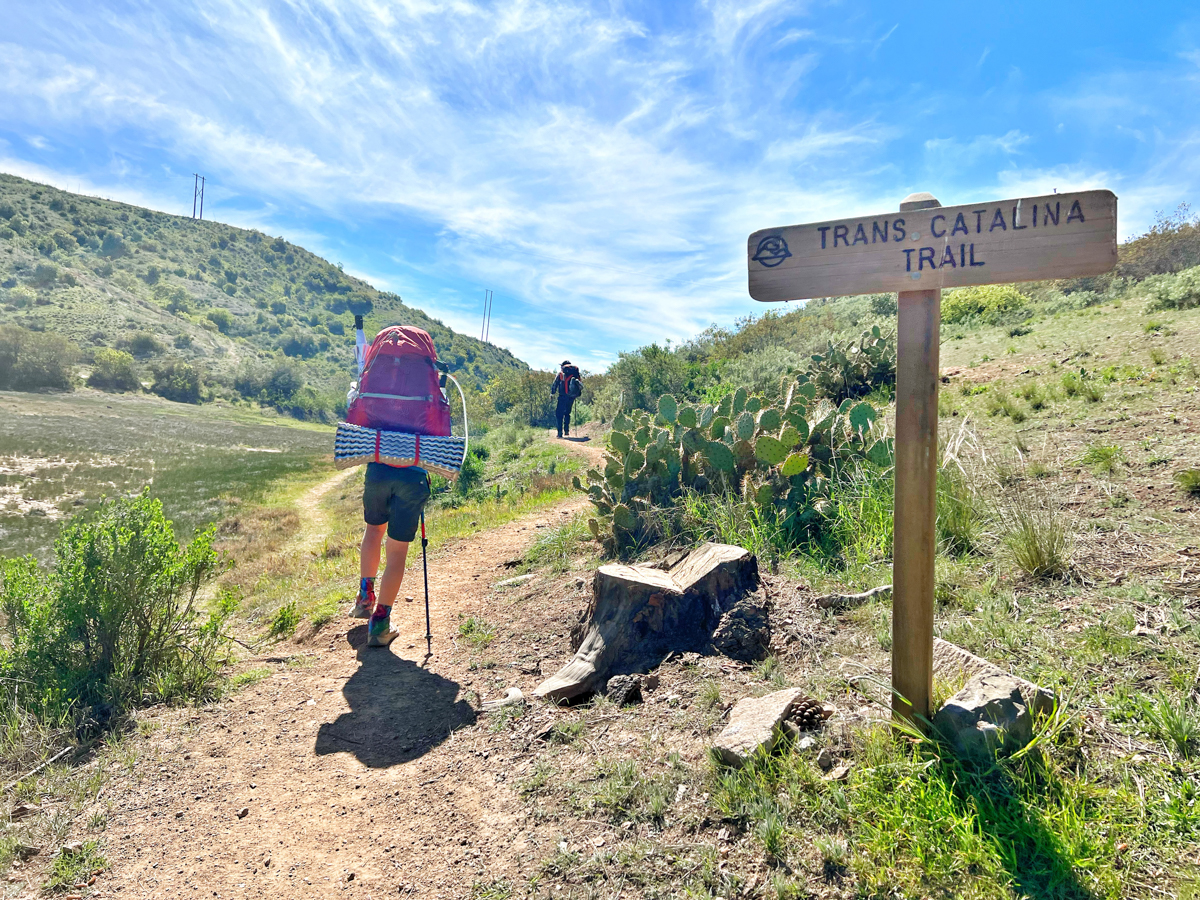
The trail starts at the end of the Hermit Gulch campground with a simple trail sign. Unfortunately we had missed the official start in town and didn’t see the first mile marker in the dark walking up to the campground.
We had heard that the first 2 miles were the hardest and if we made it past that, we were golden. Let me tell you that is not true! The first 2 miles are a steady incline, but it’s actually not too horrible to be honest. There are worst moments on the trail than this!
Once you complete the first 2 miles, enjoy a break at the first beautiful shade structure before heading on a wide fire road for the next bit. This is probably one of the flattest sections of the trail all day, so enjoy it.
After this flat area, you will turn off to the left to a small single track trail that leads down to a fenced off area. This is the area where we began to feel that maybe we are actually backpacking. The rolling hills up and down were not too long before we found ourselves at Haypress Reservoir where we had planned to have lunch. It was a little early, but we decided to stop anyway. Here there is a bathroom, running water and plenty of benches to have a break.
Keep your eyes peeled because a bison might just saunter by like one did when we were sitting here. He was on a mission though so we didn’t have time to get out the cameras before he was already gone.
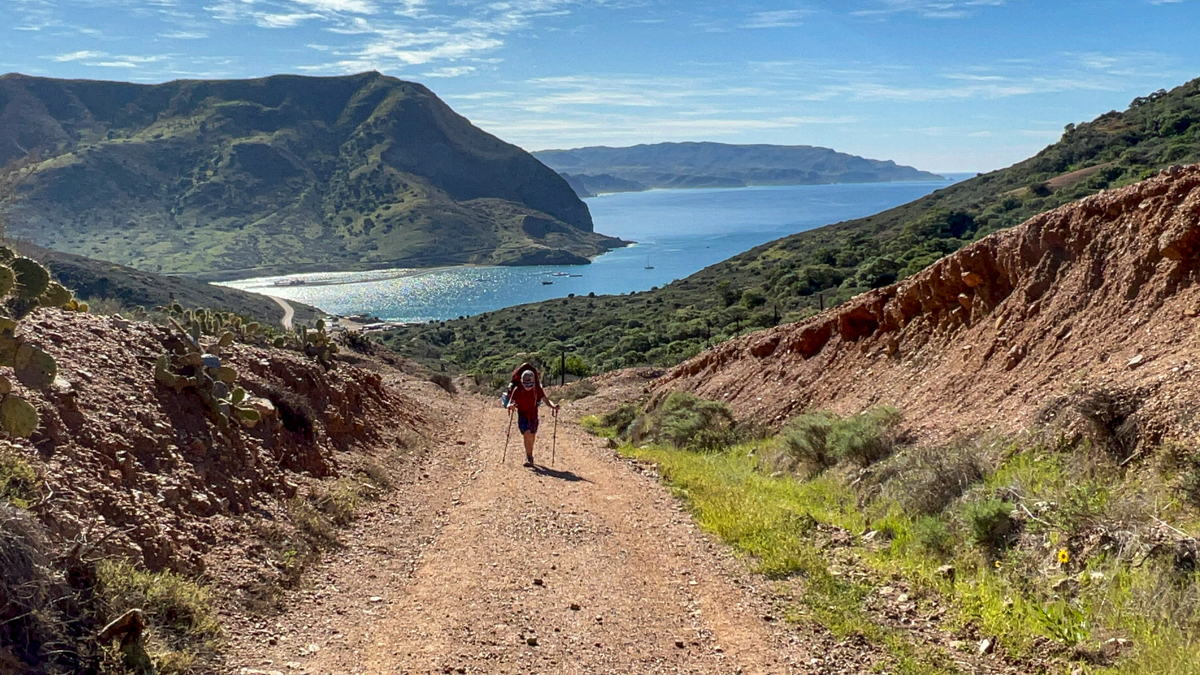
Continuing on from Haypress, the trail continues on a single track trail for a while more. The trail continues to go up and down through the hills. There are a couple of points where the hills become quite steep as you work your way up to Black Jack Campground.
The last few hills were killers for us. The ups were steep and we were tired after a long day with full packs. But we continued to trudge up the hills one step at a time. At long last we could see the campground in front of us!
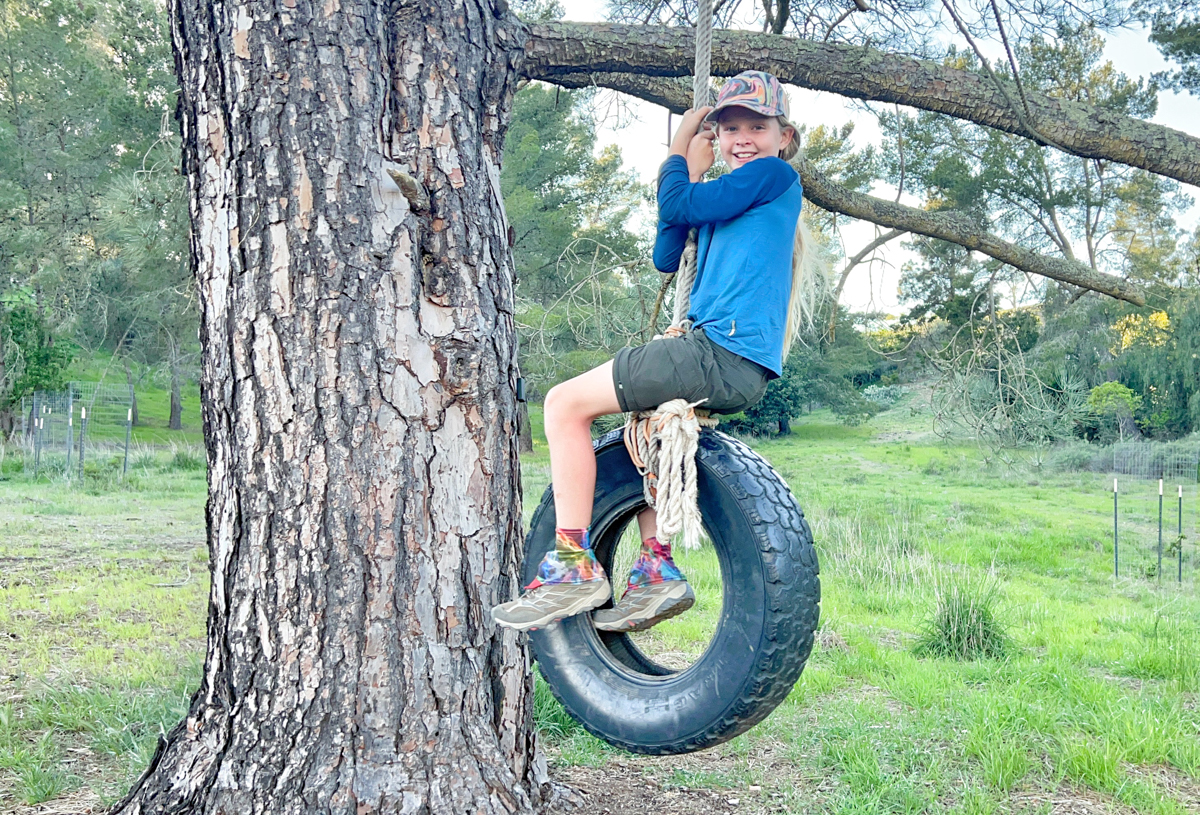
Arriving to the campground, we quickly got the lay of the land, put up our tent and chatted to the other campers – a few who were going the other direction and a few who were going the same way as we were.
Cian found the tire swing and had a ball until dinner and bed!
Day 2: Black Jack Campground >> Airport in the Sky >> Little Harbor
 It’s my birthday day! I woke up to a banner my son had put up outside the tent and a cute homemade card. But the best thing of the day was that we knew we had a 2 mile hike to the Airport in the Sky for a delicious real food breakfast! As usual with the TCT we heard that it was a little up, a lot down and then a lot more up! It was scorching hot outside with zero breeze which made the 2 miles feel especially brutal. But we did it. And were rewarded with a delicious breakfast.
After an hour break here, we decided we better hit the trail as we still had another 6 miles to go. The rest of the day was a little up and a little down, but nothing too strenuous. The biggest factor of the day was the heat and lack of a breeze.
I will tell you though that coming over the mountain and seeing the oasis that is Little Harbor out before us was a sight to behold. The sandy beach and palm trees was beautiful. I can see how this is one of the best campgrounds in the West!
Once arriving to Little Harbor, we got our bearings, enjoyed the surroundings and the beautiful campsites. Each site has a shade structure, fire pit and picnic tables.
Day 3: Little Harbor Campground >> Two Harbors
 I had heard from people that leaving Little Harbor Campground was brutal. However the people at the campground kept on saying how it was going to be an easy day with only 5-6 miles. I knew best to trust my gut and that it was going to be a slog to get up and over the mountains back to another beach. And that it was! Wowzers, this was one of the biggest climbs we had felt on the trip so far. Perhaps Black Jack was bigger, but this one felt more strenuous. My son recorded one section and it was 400+ feet of elevation gain in less than .5 of a mile, and it was straight up a mountain. The phrase of the day was “I guess they don’t like switchbacks here”.
Once you make it up that initial 2-3 miles uphill, it’s all downhill, or mostly with a few little ups here and there. But honestly the downhills can be just as painful as the roads are slippery with loose gravel making it difficult to get your footing securely.
By the end of today, my feet were killing me, even though it had been a short day overall. We reached town by 1 p.m. grabbed a $20 pizza from the General Store and rested our feet! Some of the other hikers headed off to the coin operated showers in town, but I just relaxed at our campsite taking in the views while Cian played on the beach, checking out tidepools.
After everyone was cleaned up, we all headed to dinner in town which was a great night out and a much needed break from trail life.
Day 4: Two Harbors Campground >> Parsons Landing
 The options to get to Parsons Landing consist of the easy coastal road and the “hard” route up and over the mountains. All throughout the trail people had told us how difficult the down portion was on the hard route, so we had mostly planned to take the easy coastal route to Parson’s Landing and then consider going the hard way back to town at the end. However, in the morning we had a change of heart and decided we wanted to do the entire route as it was mapped out.
This meant that the first 2+ miles were straight up hill in scorching hot sun. To be honest this portion of the trail was not pleasant. It was all on a large fire road with not many views until you reach Lobster Point Lookout. From this point, the trail views were beautiful and the hike felt a bit more pleasant – probably because we had some ocean breezes to cool us down and the major climb was over.
After a bit more slight ups and downs we made it to the last shade structure and Fenceline Road. This was the point of no return and where our major slippy slidey downhill began.
This was the section of the trail that everyone had warned us about. Some had told us that it was so steep they would never go down it and would rather go up that section. Some said it was manageable.
At the first descent I found it to be slow and slippery, but I did it without too many issues. I thought “OK I can do this.” Little did I know how much steeper the sections would become. Luckily the entire stretch is not continuously straight down. There are super steep sections with less steep sections in between.
There were two major sections that I found myself slipping on my bum. I set my bag down and literally went down on my butt. My 11 year old didn’t find it difficult at all, so he took his bag down and came back up for mine while I continued to slide on my butt.
It was stressful and a little scary for me, but I did it. I would not recommend it if you do not have poles and have little balance. I would highly recommend doing it the other direction like others had told us. But if you do want to do it like we did, just take it slow and know that it can be done – you just have to figure out what way is best for you. Some folks go down it quickly, some go slowly.
I personally looked for the deep water runoff sections which could help give me a little traction or if possible I would walk on the side of the trail where there was a little grass. This wasn’t always possible since the side of the trail was often covered in cacti.
Day 5: Parson’s Landing >> Two Harbor
 Our last official day on the trail was easy breezy. The 7.7 miles back on the coastal road starts with a little up as you leave the beach, but then flattens out and is mostly flat the whole way back. Not in a hurry we finished this in less than 3 hours. Enjoy the various views of the camp locations down below the trail, the turquoise waters and falcons flying overhead.
Once we arrived to town, we headed straight to the General Store hoping for a pizza and an ice cream, but they were not serving pizza. Super disappointing, but we managed with a sandwich and headed on to our hotel for the night. We could have stayed at the campground again, but decided to splurge on a hotel. It was perfect. The Banning House is the only real hotel in the town and well worth the price tag. Upon arrival we were offered a bottle of wine and a cheese plate. This was a great addition and unexpected.
After cleaning up and enjoying some relaxation on a bed, we headed to town for our last night’s dinner with all of our trail friends we had met along the way. It was a great way to end a really unique and fun backpacking trip.
Day 6: Two Harbors >> San Pedro >> Home
Our last morning started with breakfast at the hotel, followed by more lounging time! It was weird to not be hiking, but we explored the town a bit before getting in line for our boat back home. Reminder – you have to get a printed ticket for your boat from the Visitor Center, so arrive to the dock early enough to do this. It was sad to be saying goodbye to the trail and island, but we were super thankful for the great weather and good times1
Do you have any questions on hiking the Trans Catalina Trail?
If You Enjoyed This Post, Sign Up To Receive Posts By Email or…
- Join us on Facebook for regular updates and related articles
- Check us out on Instagram to see what we are up to in photos
- Follow us on Twitter for links to great travel articles curated just for you
- Or share this post with others by pinning on Pinterest!